
Estimated reading time: 5 minutes
Facebook has recently launched an exciting new feature called Facebook Reels, which is available globally on all IOS and Android devices.
What are Facebook Reels?
Similar to Instagram Reels, Facebook Reels is a feature that offers music, audio and video effects to make fun, inspiring short videos, where you can express your creativity.
Your Reels are shared directly to your friends/followers in their core News Feed and to new audiences in a dedicated Reels section in News Feed. Creators can also share their Reels in Groups to further expand their reach.
Where can I find Reels on Facebook?
(Currently reels are only available on the mobile app, on IOS and Android devices).
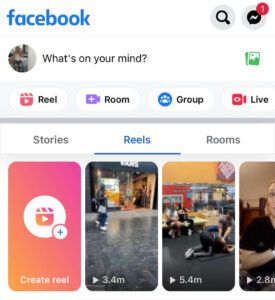
The quickest way of finding Facebook Reels is at the top of your News Feed in the ‘Reels’ section. Once you click one of the reels shown, you will be taken to the Reels Feed where swiping up reveals the next video.
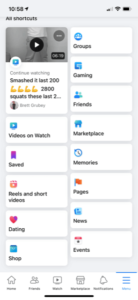
Some people don’t have the Facebook Reels tab at the top of their newsfeed yet, but don’t worry, you can still watch reels by simply clicking on the menu button in the bottom right corner of the screen and clicking the ‘Reels and short videos’ shortcut.
Once again, after clicking a reel you are then taken to a feed of different Reels, which you can swipe up through to reveal the next video.
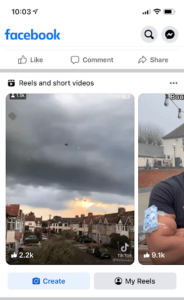
Another way of viewing Reels is by simply scrolling down your Facebook News Feed. You may come across a section that says ‘Reels and short videos’, these are Reels that Facebook has suggested you may like from people you do not already follow.
How to create a Facebook Reel
The quickest way of creating a Facebook Reel is by clicking the ‘Reels’ section at the top of your News Feed. You will then see the option to create a reel.

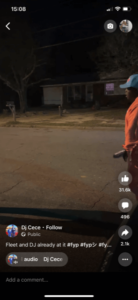
Alternatively, when you are scrolling through Facebook Reels, you will see a camera icon in the top right corner of the screen, next to your profile picture. Click on this to get started!
Once you’ve clicked to start creating a Reel, you will see a screen as shown below, with a record button at the bottom and a flip camera button in the bottom right corner.
You also have the ability to choose from your own photos to add to the Reel, which you can do by clicking the icon in the bottom left. You can also add videos from your camera roll, which you’ll be able to see above the record button.
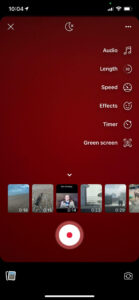
On the right hand side of the screen you will see different icons of things you can add to/change on your Reel. From top to bottom, here’s what each icon allows you to do:
- Audio Icon – Enables you to choose the audio you want to use in your Reel, whether it’s saved audio (from another Reel), an audio you search for using the search bar at the top of the screen or an example audio shown when you click the icon.
- Length Icon – Lets you to change the length of the Reel, you can choose between 15, 30 or 60 seconds, this will be how long the sound plays for and you will be able to record for.
- Speed Icon – Allows you to be able to change the speed of the Reel, this can be 0.3x, 0.5x, 1x, 2x, 3x, so it either slows down or speeds up the sound while you are recording, this can be good to use if you are lip syncing to an audio that is too fast.
- Effects Icon – There are hundreds of different effects for you to choose from and apply to your Reel. You can change the effects throughout the recording if you wish too.
- Timer Icon – Shows you a countdown timer of either 3 or 10 seconds before the audio/music begins, giving you time to get ready to record!
- Green Screen Icon – A green screen lets you add an image behind you. This is a good idea if you want to hide anything in the background or add something else behind the subject of your video. There’s a variety of green screens to choose from, you can also use an image from your camera roll.
Once you have created your Reel, you can write a description for it, choose an audience you want to share your Reel with (public, friends or friends except certain people) and then tap share to public.
Note: If you are 18 and older, Facebook Reels on personal profiles are automatically set to public, but you can change the audience for each individual Reel.
Reels from business or creator pages can only be posted publicly. Your friends may also be able to see your reels in areas like their Facebook News Feed.
How to Save a Sound
While scrolling through Reels, if you find music or audio that you want to use to create your own Reel, just click the sound at the bottom of the reel.
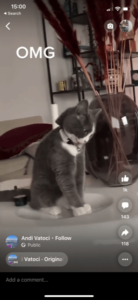
You will then see an option to use the audio or save it. If you want to make the reel at that current time click ‘use audio’ or to use the sound at another time click ‘save’.
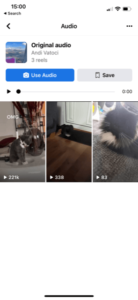
You will find all of your saved audio in the audios section when you’re on the screen to create a Reel.
Can you share Reels from Facebook to Instagram?
Although there isn’t yet a way to share Facebook Reels to Instagram, you are able to share Instagram Reels to Facebook Reels.
To do this you will need to have a public Instagram account, you will then be asked to opt-in to share your Instagram Reels on Facebook. Likes and comments will be shown on the reel on both Instagram and Facebook.
Another way that allows you to share Instagram Reels to Facebook is by clicking on the Menu tab located at the top-right corner of Instagram, going to “Settings”, then “Privacy” and “Reels” and then toggle on the “Recommend of Facebook” option.
Talk to us!
Do you need more help with social media for your business? We can help with social media strategy, content ideas (for reels transitions, stories and posts!), how to use all the functions on the different social media platforms and advertising too.
We offer a range of social media training sessions, as well as SEO and email marketing training, and are happy to help whatever your level of experience!


Leave a Reply